This article will show you how to create a custom attribute in Active Directory and associate it with the User Class. You must be a Schema Admin to complete these steps. For this example I’ll show you how to add a Favorite Beer attribute. (Why isn’t this in there already!)
Disclaimer: Editing the AD schema should not be taken lightly. Changes can be irreversible. Do this at your own risk!
Open the Active Directory Schema
First, Open the Schema Management Snap-in. By default, Microsoft wants to keep you out of the Schema, so you may need to enable it by registering the Schema Management DLL. To do this, run this command from a command prompt:
regsvr32 schmmgmt.dll
Next, Open MMC and add a new Snap-In. You’ll now see “Active Directory Schema” in the list. Select it, click add and click OK.
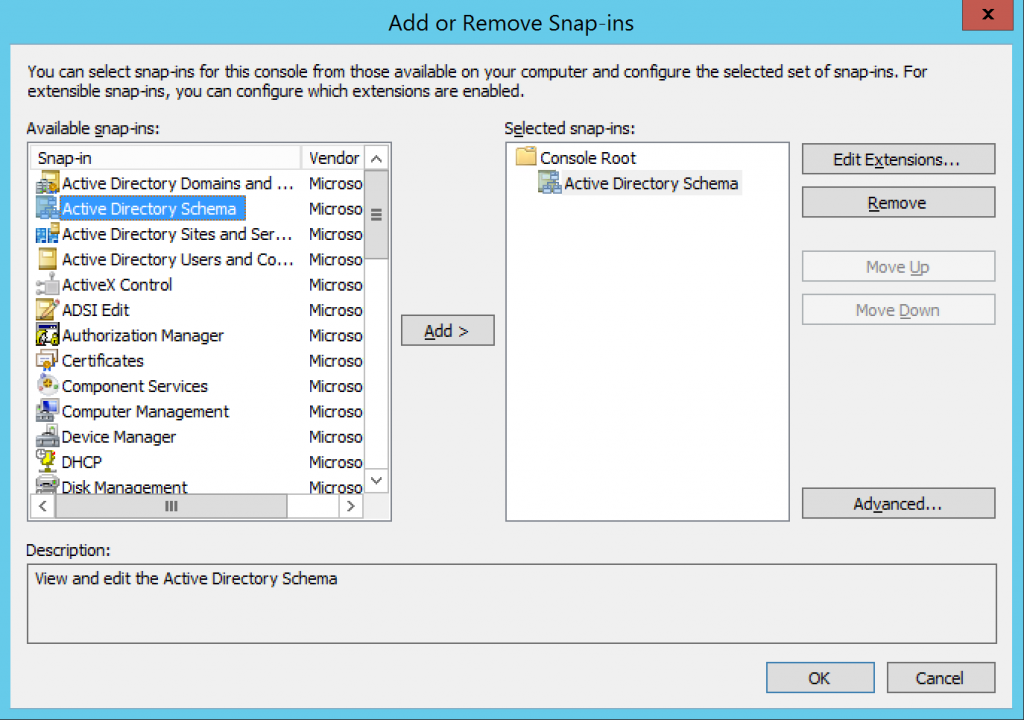
Create the Custom Attribute
Expand Active Directory Schema, Right click on Attributes and click Create Attribute

You will get a warning instructing you of the dangers of modifying the schema. If you are ready to proceed, click Continue.

The Create New Attribute form will appear. Enter the name of the custom attribute in the Common Name field. In my case, it’s FavoriteBeer. Avoid special characters and spaces.
The LDAP Display Name should automatically be created with first letter lowercase. (This follows the camelCase like standard for most of other attributes) Modify it if needed, but it’s probably best left alone.
The Unique X500 Object ID requires a little extra work. (Why don’t they just have a “generate OID” button). We have to generate our own unique OID. This OID must be in the correct format and must also contain the correct prefix. To make this easy, open up a PowerShell window and copy\paste the following commands (Tip: You can paste the whole block at once):
 $Prefix="1.2.840.113556.1.8000.2554"
 $GUID=[System.Guid]::NewGuid().ToString()
 $Parts=@()
 $Parts+=[UInt64]::Parse($guid.SubString(0,4),"AllowHexSpecifier")
 $Parts+=[UInt64]::Parse($guid.SubString(4,4),"AllowHexSpecifier")
 $Parts+=[UInt64]::Parse($guid.SubString(9,4),"AllowHexSpecifier")
 $Parts+=[UInt64]::Parse($guid.SubString(14,4),"AllowHexSpecifier")
 $Parts+=[UInt64]::Parse($guid.SubString(19,4),"AllowHexSpecifier")
 $Parts+=[UInt64]::Parse($guid.SubString(24,6),"AllowHexSpecifier")
 $Parts+=[UInt64]::Parse($guid.SubString(30,6),"AllowHexSpecifier")
 $OID=[String]::Format("{0}.{1}.{2}.{3}.{4}.{5}.{6}.{7}",$prefix,$Parts[0],$Parts[1],$Parts[2],$Parts[3],$Parts[4],$Parts[5],$Parts[6])
 $oid
Here is an example of what this looks like. The OID is the highlighted text below. Copy and paste this in the X500 Object ID field. This is example output. Do not use the same OID that I got. Run the commands to get your own.
Feel free to give your new attribute a useful Description.
Next is Syntax. This is the data type of your new attribute. Since I need to store names of drinks that may contain letters and numbers, I selected Unicode String for alpha-numeric data. I left the Minimum and Maximum range blank. Here’s what mine looks like:

When finished, double check everything (Remember this can’t be undone). Then click OK.
You have now created a new Active Directory Custom Attribute. Next step is to bind it to the User Class.
Bind the Attribute to the the User Class
To do this, Click on Classes, then find and double click on the User Class:
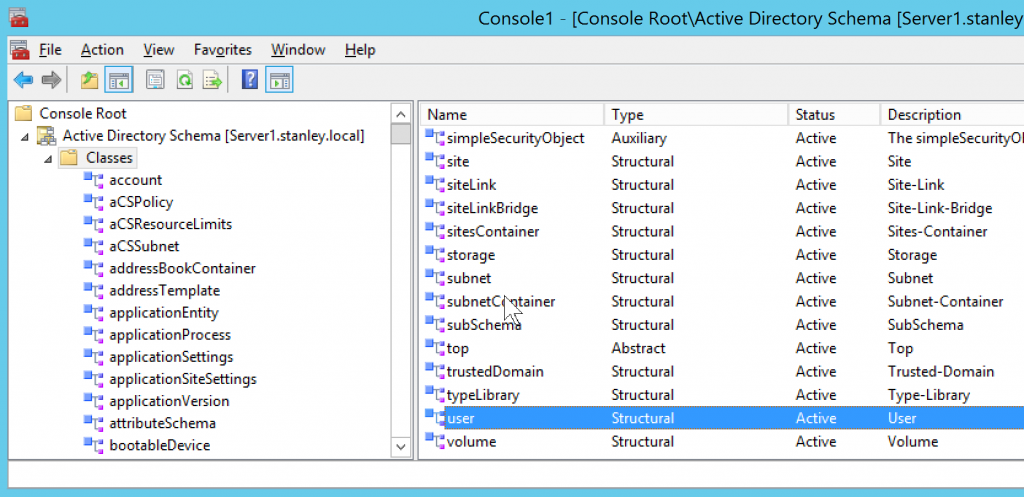
Click the Attributes tab, then click Add and find your new attribute and click OK. Your attribute will be added to the Optional attributes. Click OK to save and close the User Class Properties.
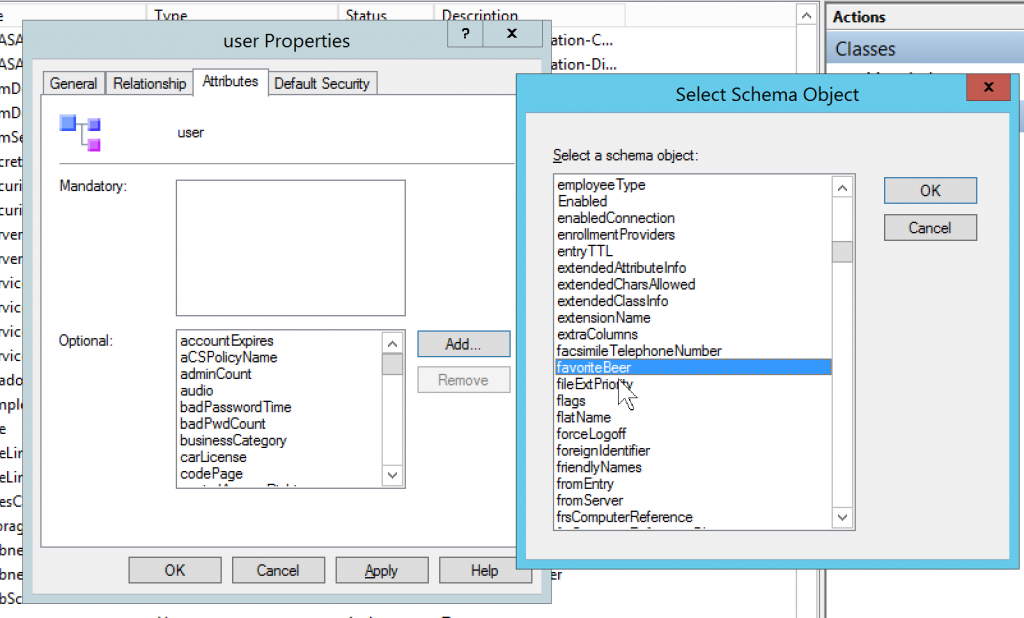
That’s it. You can close the Schema Management snap-in.
Test it
You can now modify this like any other user attribute. Open Active Directory Users and Computers (with Advanced Features enabled) and go to the Attribute Editor tab.
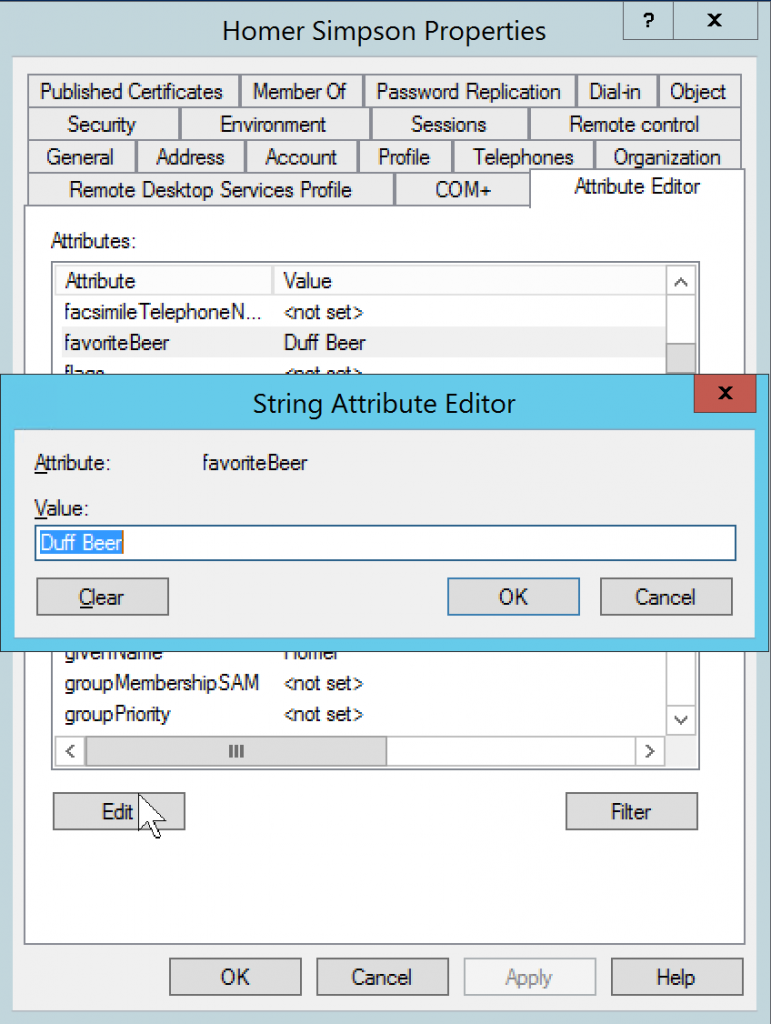
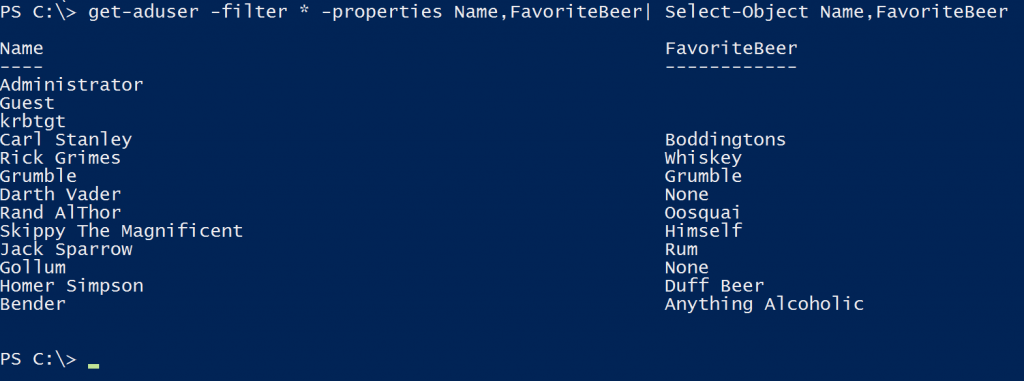
You can also query and set this new custom attribute via PowerShell:
-Carl
